Showing posts with label Panels. Show all posts

Saturday, October 10, 2009

35 & 36 Ford Rumble and Standard Deck lid Skins


These deck lid skins fit both a 35 & 36 ford coupe or roadster. They are the same whether a rumble seat or a standard lid. The hole for the latch handle will be laid out and can be put in if specified upon order. The gaps will be just as stock with 3/16" on the sides and just under 1/4" top and bottom for opening clearance. The flange around the edge will be a 1 1/8" with a slight indent 3/8" inward to allow for the hemmed edge to cover the inner structure. For pricing or any questions contact Josh at 435-559-5156.


Friday, October 9, 2009

Shaping 35 & 36 Ford Decklids


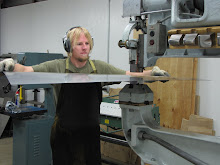
After all the shape was put in on the yoder, the panel was fit to both the buck and car to insure everything was correct. The edges were then trimmed and flanged to a 90 degree angle.

Monday, October 5, 2009

Aluminum hood

This was a three piece aluminum hood using Hagan hood hinges. The material used was .060 3003 H14 Aluminum.

Wednesday, August 12, 2009


This panel was for a 50's Cadi and filled in between the rear window to the deck lid. We used the pullmax to install the steps in to the panel.

Monday, August 10, 2009

TRANS TUNNEL


This is a trans tunnel for a 27 model T. I made a cardboard template around the trans at the customers Home and then fabricated the tunnel to fit. The tunnel was shaped as one piece and had a mounting flange around the perimeter to be spot welded or bolted.

Thursday, August 6, 2009

WHEEL TUBS


The wheel tubs on this project where fabricated to blend from the outer rear fenders though the bed making everything flow. We also fabricated the roll pan and rear bed posts.


36 FORD ROADSTER CONVERSION


The templates for these panels were from a 36 ford phaeton, intending to convert over a 36 ford coupe into a roadster.

36 STUDEBAKER PANEL

These panels are the rear pan on a 36 Studebaker and were made from 18 gauge sheet metal and was shaped as one piece. The main shape was done on the Yoder power hammer and the details were installed using the planishing hammer and pullmax.


Tuesday, July 14, 2009

PROJECTS


These are a couple of the projects we have been working on over the past few of months.